The Construction of a New Home from Start to Finish
Read on to see a timber framed house being built from the foundations to the finished interior decoration.
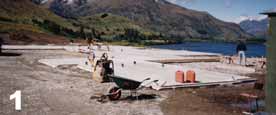
1) The base foundation of the house.
It has a concrete floating slab foundation rather than the traditional piles, floor joists and a timber floor.
This is the most economic way of building a floor for this site considering the labour involved is less and the ease of getting materials in the countries region concerned.
The rebate to the edge of the slab that runs the entire perimeter is for the concrete block skin to sit on.
It is at a lower level to ensure that any water collection from weather is below the floor level.
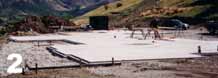
2) A view from the opposite end of photo 1
Note the site positioning of the house and the picturesque aspect towards the lake and mountains. The timbers in the foreground are the builder’s profiles for setting up the foundations to the correct positions and angles.
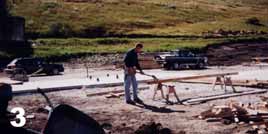
3) The foundation of the home lying in the lee of the hill
The builder is preparing framing by using a spade to clean off any residue and loose timber.
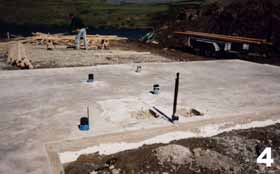
4 and 4a) Floor and Services
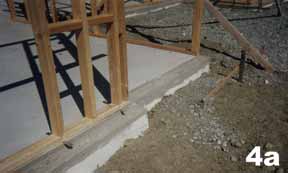
The white edging to the foundation is a 50mm wide strip of polystyrene. It is there to create an insulation barrier or thermal break between the foundation and the exposed exterior ground. This will help prevent the cold from entering the house via the foundation and the floor. The blue pipes seen protruding through the foundation are where the waste pipes are situated for the guest bedroom area. The black pipe protruding is the main water feed to that end of the house.
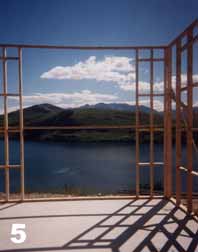
5) The start of the wall framing
Most timber-framed homes are made from 100x 50 mm timber studs (the tall upright pieces) and dwangs (the middle horizontal pieces). This view is from the living room looking up through the opening for the main picture window.
The studs are closer together here to add strength to a wall with such a large opening. When you are decorating the room and want to hang objects such as pictures and ornaments onto the walls, the studs and dwangs are the timber frames that you are looking to find to secure your fastening into. (Masonry is different, in that a hole is drilled and a proprietary fitting is used to secure an anchor to the wall for hanging objects from). These timber frames shown have the studs at 450mm center to centre and the dwangs at 600mm intervals.
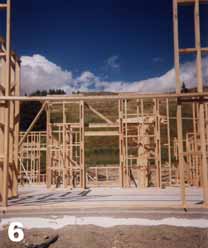
6) Wall Framing
Looking back through the window in the previous shot. This shows that the design allows for an exterior view from the kitchen through the living area picture window. With interior design all aspects have to be considered simultaneously of the entire space. You need to think in three dimensions and never room by room. The building and interior space must be considered as a whole and how each space relates to the next. When you consider and act on this you will ensure that the interior flows at its best.
Interior design is not just about decoration, spatial design is vitally important to provide the pleasing proportional areas that form the solid grounds to decorate.
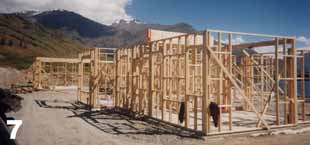
7) Wall Framing
General wall framing of the building and we are now getting a good feel for the size of the spaces. The “big beam” at the top of the framing is actually roof trusses stacked and waiting to be erected. The wall framing is temporarily braced back to the ground at angles to keep the walls straight and upright.
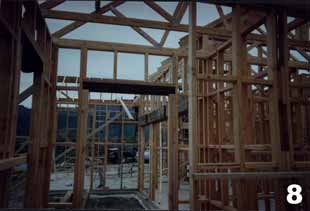
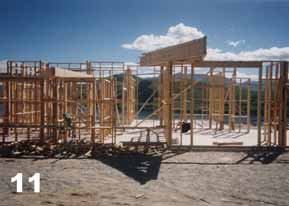
8)9)10) and 11) Framing, Roof and Decorative Elements
These are views of the framing in detail and the start of some of the decoration features.
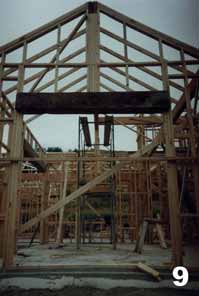
Remember the style of the home is to be Rustic / Tuscan, therefore we have used old railway sleepers and bridge beams as exposed lintels over the exterior doors and windows.
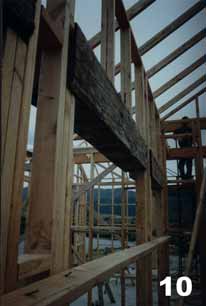
10) Details
The rough bridge beam timbers have a rebate cut ready to take the plasterboard for a snug finish to the join. If you look at view 8 then you’ll see the nail plates that hold the trusses together. The triangulation of the timbers and the nail plates form a very strong frame for the roof.
Roof framing stacked on top of the walls
Railway sleepers
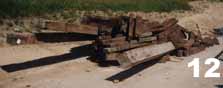
12) Materials
A collection of old bridge beams and railway sleepers which are to be used as Lintels, as well as part of the paving and landscaping system.
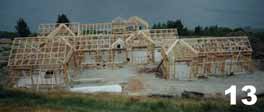
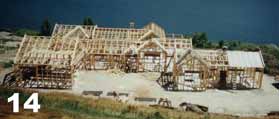
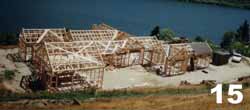
13) 14) and 15) Framing
Here we have an overview of all the framing and the house in its entirety. It is beginning to take shape. Note on shot 13) the tower above the entrance is in place and in the later photos it is not. Designers and owners don’t always agree but it is only opinions at the end of the day and your design shouldn’t have to stand up on just one feature. Design is always a series of compromise, from budgets to availability, timeframes and opinions. The designer’s job is to follow the brief ensuring that the client is looked after (even sometimes saving them from themselves) and if compromise is needed to achieve that then to be professional you should do so.
Home – timber framed
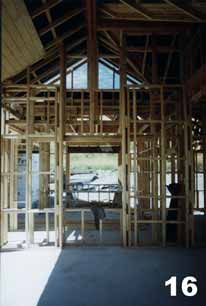
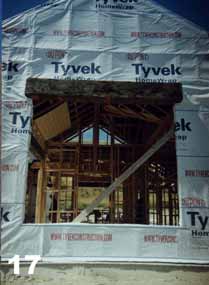
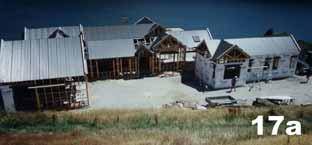
16) 17) and 17A) Linings
Taken from the same view as 6) the framing is now being lined with building paper and the roof is on. Note the pitched or vaulted ceiling and the rough sawn board effect. The board was placed so that the owner and designer could experiment with the look and finish.
As a designer don’t be afraid to review your design as construction takes place. Often new materials or ways of achieving a look need careful consideration and inspection while being built. Nearly all project managers would throw their hands up in despair at this thought but timing and budget can be considered and planned to take this work into consideration as long as it is done before the construction contract is let.
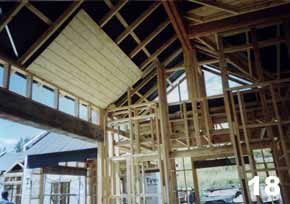
18) Ceiling
Another view of the finish to the vaulted ceiling.
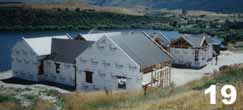
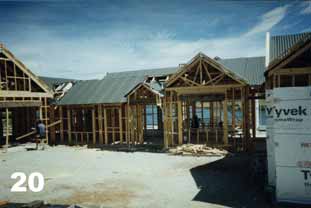
19) and 20) Linings
The home is starting to take on a three-dimensional form as the roofing goes on and the walls are starting to be lined.
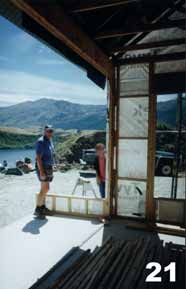
21) On Site Antics
The owner and builder keep a wary eye on the designer let loose with a camera.
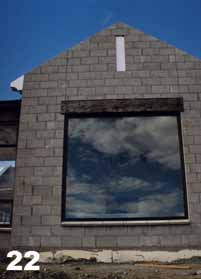
22) Concrete Block
Refer to shot 6) This shows the window and the base cladding of concrete block in place. The exposed lintel is shown above. A textured and colored plaster will be applied to the block.
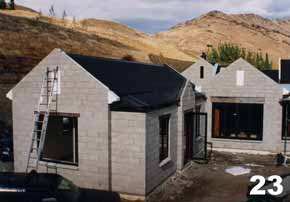
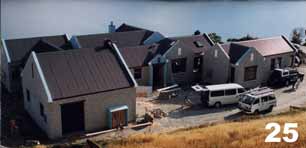
23) 24) and 25) Details
The home is really taking form now that it is closed in. The proportions and features are becoming very apparent. Note the use of Polystyrene cut to make the form of “corbels” and recesses to the gables. These get clad in netting and plastered over to create the form economically.

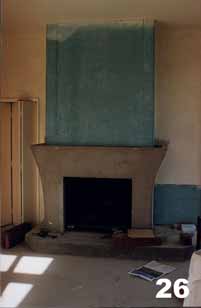
26) The Fireplace
The fireplace to the living room. It is made from precast concrete and plaster board on a timber frame. Note that the firebox and flue are proprietary steel components and contain the fire heat and gases separately from the surround.
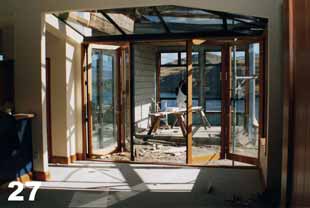
27) Bi Folding Windows
A view from the conservatory /kitchen showing the bifolding exterior doors. These are double glazed aluminium doors with cedar timber liners to match the timber trim internally.
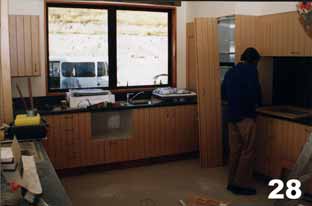
28) Kitchen
Into the finishing trades now. Obviously this is the kitchen. It is a simple melamine finished medium density fiberboard that has had grooves routed out of the panel to create a boarded look economically while still maintaining an easy to clean and maintain surface.
For more information on timber products
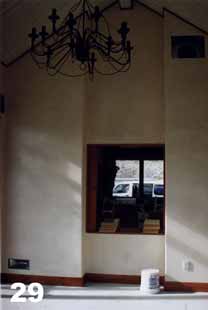
29) Living Room
Looking from the living room to the kitchen with the paint effect finish on the walls and the candelabra style iron light fitting. The paint finish is a brushed sand effect that can be purchased ready made or you may like to experiment making your own by adding lime to paint. For more information on paint
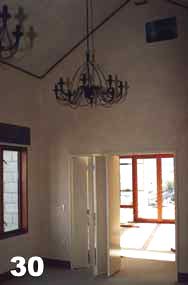
30) Dining Room
Looking from the dining room to the living room. The same effect is used in the living room as each room opens on to the other, note the lintel set in the wall above the windows.
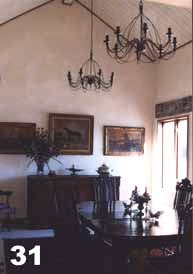
31) Dining Room
The dining room complete with its iron candelabra light fittings sits over the antique table and carver chairs. The sand paint effect softens the strong direct light reflected from the lake while the grooved and vaulted ceiling has a white wash giving the same rustic feel.
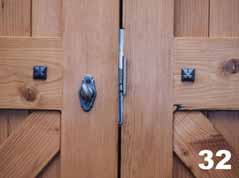
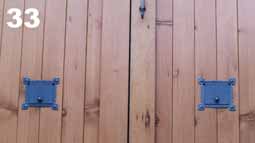
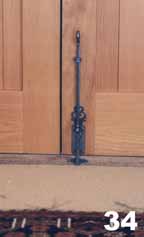
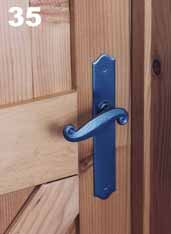
32) 33) 34) and 35) Hardware
The hardware to the home is iron with a castle/ antique feel and look. The finish is called patina and is pewter in appearance.
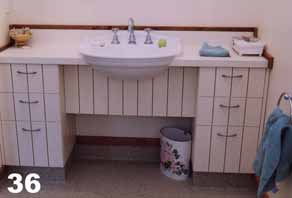
36) Joinery
The same finish to the kitchen joinery is used in the bathroom. The tapware and basin are traditional fittings rather than modern. Finishes and styles can change from room to room but it is best to keep it similar in the same room unless you’re an expert at eclectic design. Note the opening under the basin and the recess is to allow disabled people in wheelchairs access. For more information on bathroom fittings
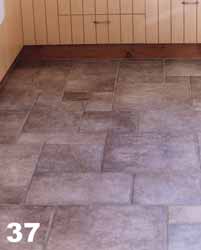
37) Flooring
These paving stones are actually tiles. They have been used in the kitchen and conservatory for cleanliness in an area that easily becomes wet and can have food scraps fall on it. It also acts as a passive form of heating. Stone and concrete and similar dense materials act as heatsinks. When the sun shines on them all day they tend to absorb the heat, however when the heat source is removed e.g. at night they then release the heat. Hence we get the sun on the floor during the day acting as a heat sink and releasing it as passive solar heating during the evening. For more information of hard flooring
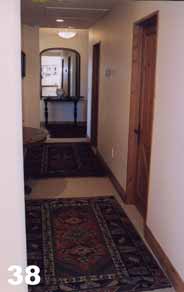
Large Persian rugs on top of a sisal look wool carpet.
38) Flooring
The rest of the floor coverings throughout the house are large Persian rugs on top of a sisal look wool carpet. Once again that earthy feel through the flooring but still maintaining the luxury of a modern wool carpet.
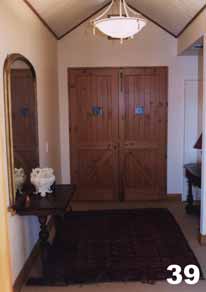
39) Entrance
The main entrance with double doors and shuttered peepholes. The arched ceiling running the length of the entrance helps create that feeling of movement towards the entry or the living area.
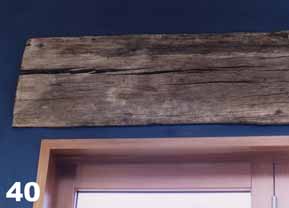
40) Bridge Beam
This is a close up of a bridge beam lintel set into the wall. This blue is also in the sand effect paint and is used as a feature color of the conservatory.
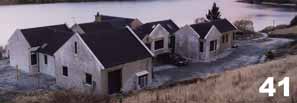
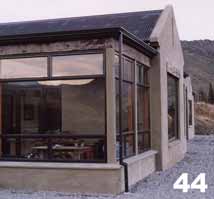
41) 42) 43) and 44) Plasterwork
The house is nearing completion with the second to last coat of the plastering being finished.
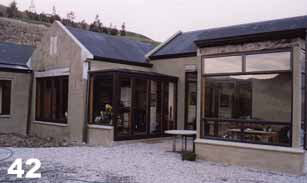
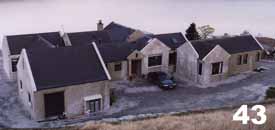
Note how the polystyrene corbels are now gone and are plastered as part of the building.
45) 46) and 47) Three different rooms with the same color to the walls and finish to the floors but with dramatically different looks through the use of the soft furnishings.
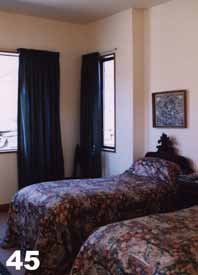
Traditional fabric to match the bed ends.
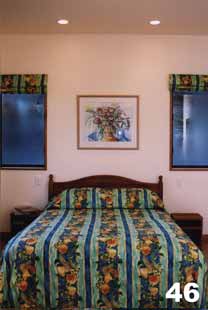
Fun and colorful fabric provides a fresher more modern look.
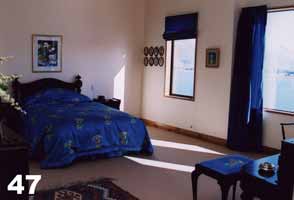
Note that although it is fun to paint each room with a totally different scheme it is often a great deal of work and not practical to do so. Soft furnishings can change each room while keeping the paint color system similar if not the same for each room. It is very easy to give the room a new look with soft furnishings.
That is the end of our new home construction. We hope it gave you an insight into how a timber framed house is constructed.
See how this new home was planned
To view room 46 in different colorways
